Scanning · Scan to folder
How do I set up scan to folder from the copier to a Windows PC?
Share a folder on the PC, then add it to the copier’s address book so users can scan straight to it.
Before you start
The copier needs a Windows account to log in to the shared folder. Choose which account to use:
| Recommended Option A: a dedicated “Scanner” local user A separate local account used only for scanning. It isn’t tied to anyone’s login, so scanning keeps working when a user changes or resets their password. Start at step 1. | Alternative Option B: the user’s own account Uses an existing Windows login. Quicker to set up, but scanning stops every time that password expires or changes, and the copier has to be updated each time. Skip to step 3. |
Part 1: Create the Scanner user (option A only)
Create the local user. On the PC that holds the scan folder, go to Settings > Accounts > Other users > Add account. Choose I don’t have this person’s sign-in information, then Add a user without a Microsoft account. Enter Scanner as the user name and set a password. Write the password down; you’ll need it in step 19.
Note: The account must have a password. Windows won’t accept a network connection from an account with a blank password.
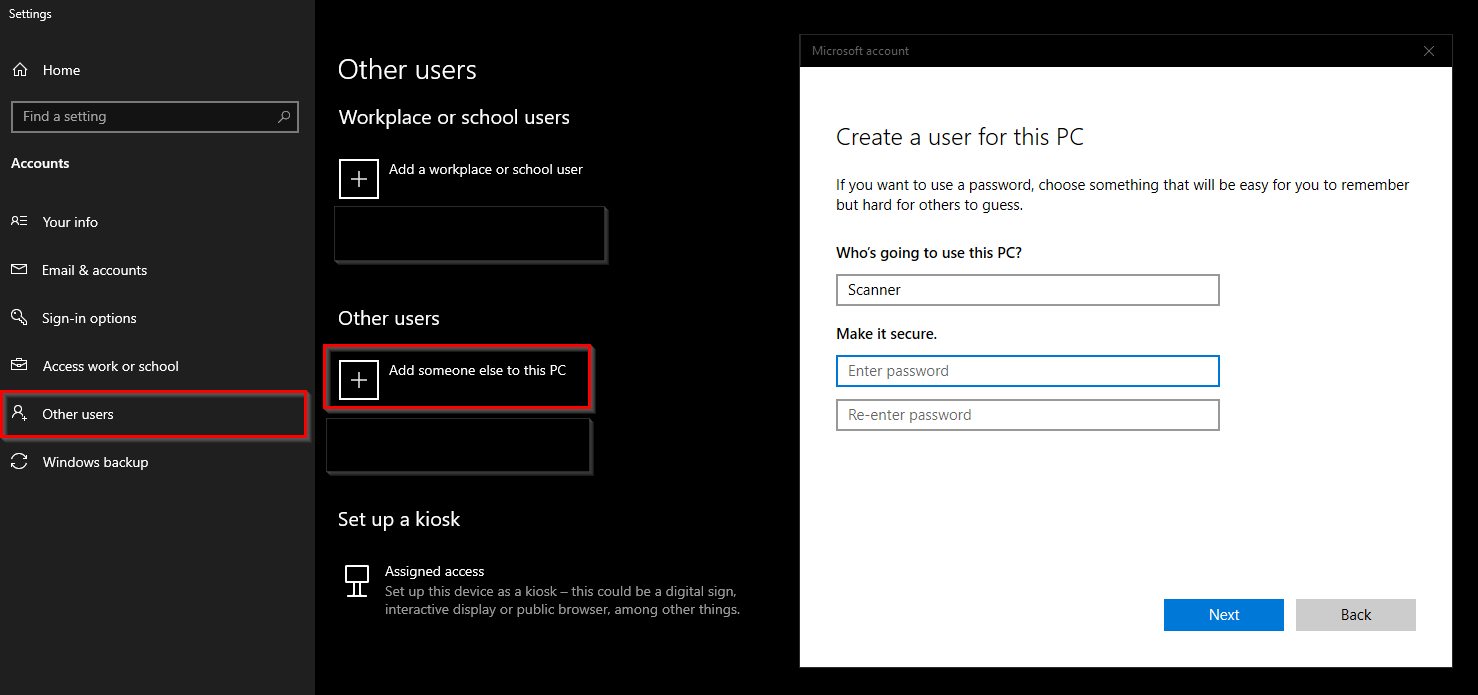
Make the account an administrator. In Settings > Accounts > Other users, select Scanner, click Change account type, choose Administrator and click OK.
Part 2: Share the folder
Find or create the scan folder. Browse to the folder you want scans to land in, or create a new one. Keep the name short with no special characters, for example C:\Scans.
Open the folder properties. Right-click the folder and choose Properties.
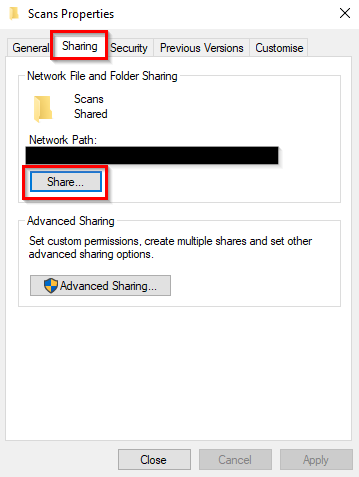
Start sharing. On the Sharing tab, click Share….
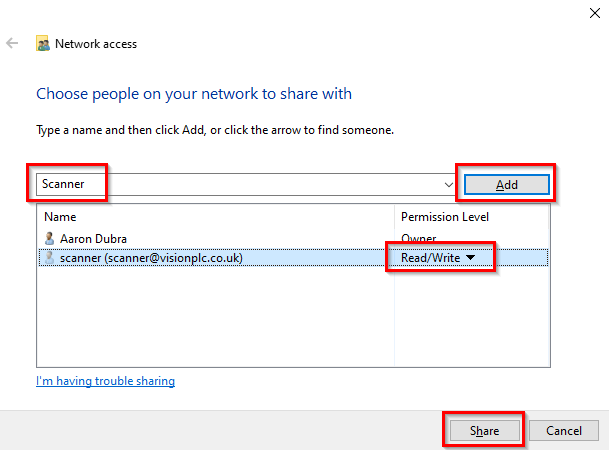
Give the account access. Type the name of the local account (Scanner, or the account you chose under option B) and click Add. Set its Permission Level to Read/Write, then click Share.
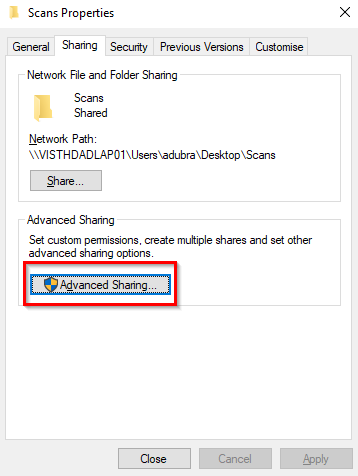
Open advanced sharing. Back on the folder properties, click Advanced Sharing….
Name the share. Tick Share this folder, enter a Share name, then click Permissions.
Tip: Keep the share name short with no spaces, for example Scans. It becomes part of the network path the copier uses.
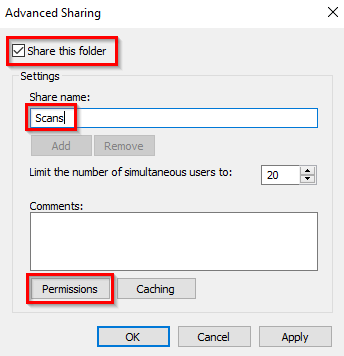
Add the account to the share permissions. Click Add, enter the user name of the local account, click Check Names, then click OK.
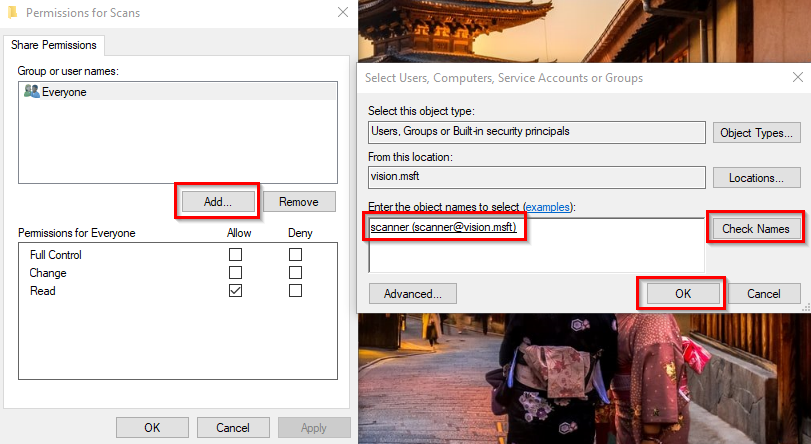
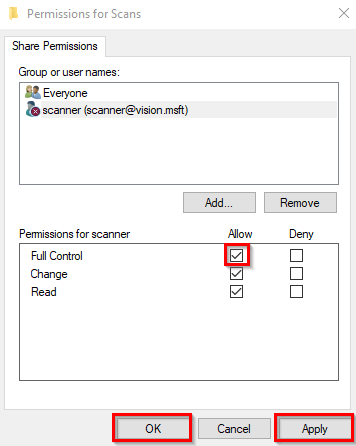
Allow full control. With the account selected, tick Allow next to Full Control. Click Apply, then OK.
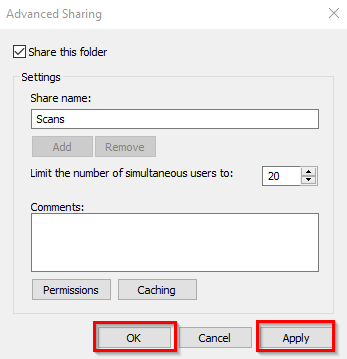
Save the advanced sharing settings. Back on the Advanced Sharing window, click Apply, then OK.
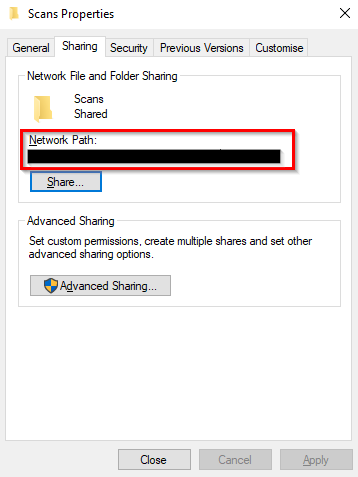
Copy the network path. Back on the folder properties, copy the Network Path shown on the Sharing tab, for example \\PC-NAME\Scans. You’ll paste this in at step 20.
Tip: If the copier can’t find the PC by name, use its IP address instead, for example \\192.168.1.50\Scans. Give the PC a fixed IP address first, or the path will break when the address changes.
Part 3: Add the folder to the copier
Log in to the copier’s web page. In a web browser, go to the IP address of the copier. Click Login (top right), enter admin as the user name, leave the password blank and click Login. If these details don’t log you in, contact us.
Note: Use Edge or Chrome. Internet Explorer doesn’t display the copier’s web page correctly.
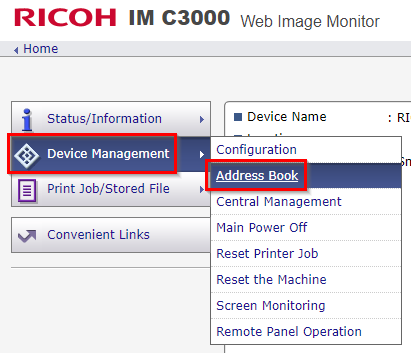
Open the address book. Hover over Device Management on the left and click Address Book.
Add a new entry. Click Detail Input, then Add User.
Note: To update an existing entry, tick the box to the left of the user in the list and click Change instead of Add User.

Name the entry. Enter the user’s name in both Name and Key Display. Key Display is the label shown on the copier’s screen.
Set the authentication type. Next to Folder Authentication, select Specify other Auth info.
Enter the account name. In the user name field, enter Scanner, or the name of the account you chose under option B.
Set the password. Click Change under the user name field and enter the password for that account.
Enter the folder path. Paste the network path from step 12 into Path under the Folder section.

Save the entry. Click OK in the bottom-left corner to save. Send a test scan to the new entry from the copier and check it arrives in the folder.
If the scan doesn’t arrive
If the test scan fails, check these in order:
- The PC is switched on and awake. Scans can’t reach a PC that’s asleep.
- The path in step 20 matches the network path from step 12 exactly.
- The user name and password in steps 18 and 19 match the Windows account.
- If you used option B, the user hasn’t changed their password since the entry was set up.
- Make sure IP settings and DNS settings are correct on the printer.
Was this article helpful?
That’s Great!
Thank you for your feedback
Sorry! We couldn't be helpful
Thank you for your feedback
Feedback sent
We appreciate your effort and will try to fix the article