Remote monitoring
How do I connect my printer to VRFM using HP Cloud?
HP printers can be onboarded straight to the cloud with HP’s own tool. You run it once, export the result, and send us the file.
Before you start
- This only works for HP printers. Anything else won’t be selectable in the tool.
- You’ll need an HP account to sign in.
- Have the printer’s admin username and password to hand if it has them set.
Onboarding a printer
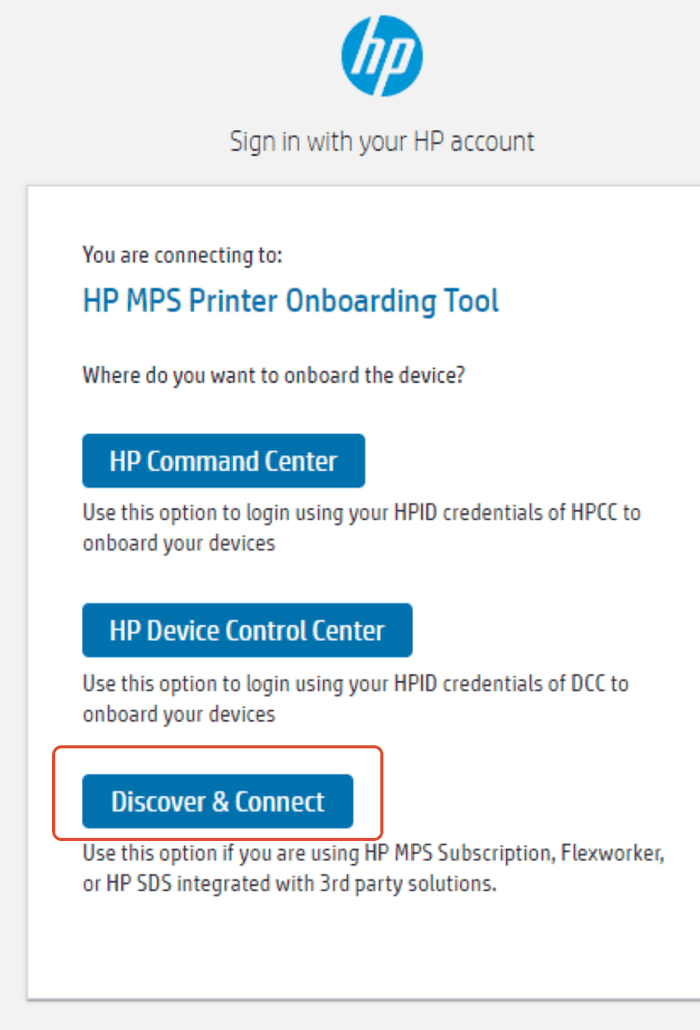
Download the tool and choose Discover & Connect
Download the HP MPS Printer Onboarding Tool, run it, and sign in with your HP account.
When it asks where you want to onboard the device, choose Discover & Connect — not Command Center or Device Control Center.
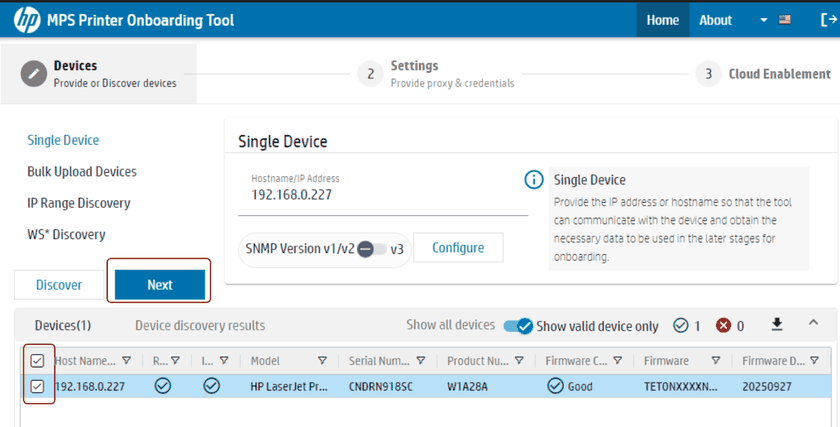
Choose how to find the printers
Pick whichever suits down the left-hand side:
- Single Device — one hostname or IP address
- Bulk Upload Devices — a list of them. There’s a template you can download
- IP Range Discovery — scan a range
- WS* Discovery — find them on the network automatically
Fill in the details, then click Discover.
Tick the printers you want
The results appear underneath. Tick the ones to add, then click Next.
If the printers use SNMPv3, set that with the toggle and Configure before discovering.
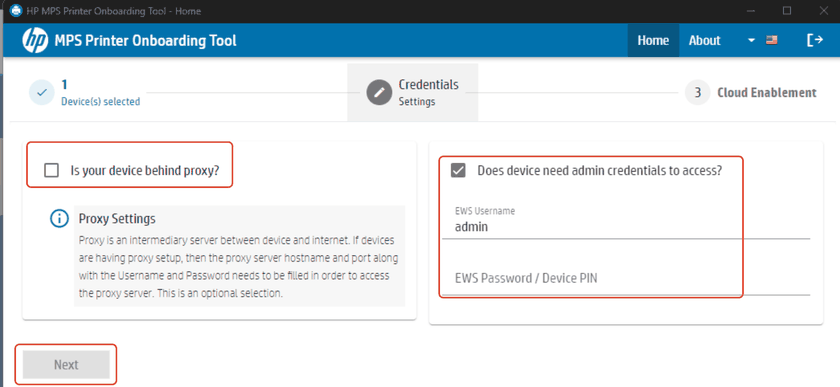
Proxy and admin credentials
If the printers reach the internet through a proxy, tick Is your device behind proxy? and fill in the server details.
If the printers need a sign-in, tick Does device need admin credentials to access? and enter the EWS username and password. Then click Next.
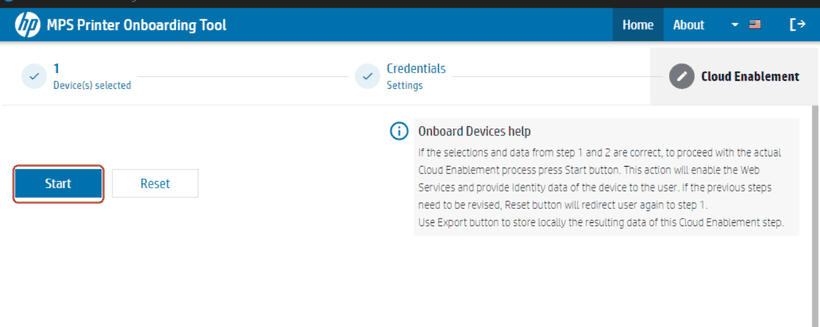
Start the cloud enablement
Click Start. The tool turns on web services and registers each device.
Export the result
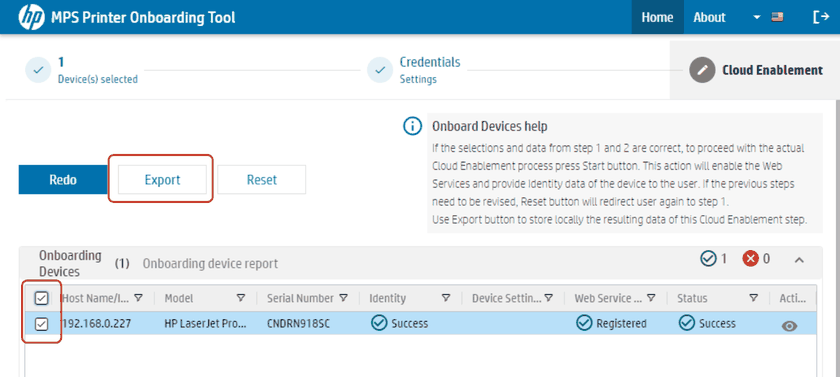
Each printer should come back Registered and Success. Tick the ones you’re sending on and click Export.
Save the file and send it to us
Save the CSV somewhere you’ll find it again.
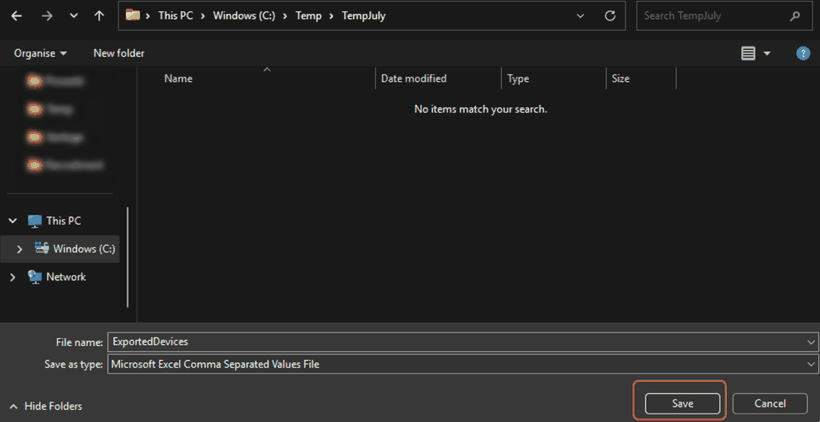
Send the export exactly as the tool saved it. Opening it in Excel and saving again is enough to break it, and the import will fail.
Email it to whoever asked you for it. If you’re not sure who that is, send it to vrfm@visionplc.co.uk.
Was this article helpful?
That’s Great!
Thank you for your feedback
Sorry! We couldn't be helpful
Thank you for your feedback
Feedback sent
We appreciate your effort and will try to fix the article